≡ Menu
Ownership Costs Checklist: Plan for Ongoing Car Ownership Expenses

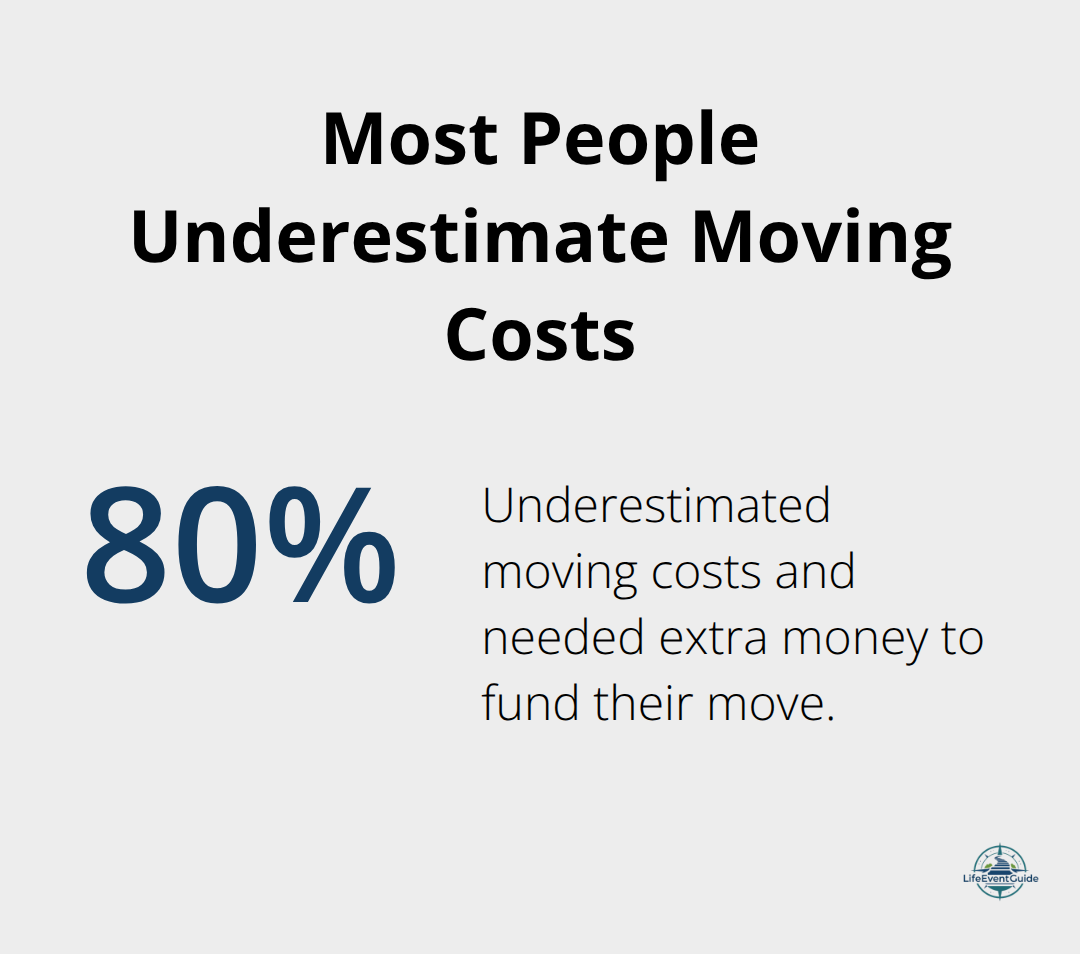
Buying a car is exciting, but the real costs start after you drive it home. Most new owners are surprised by how much they spend on fuel, insurance, maintenance, and repairs each year.

We at LifeEventGuide created this ownership costs checklist to help you understand exactly what car ownership will cost you month to month and year to year. With a clear picture of these expenses, you can budget confidently and avoid financial stress down the road.

What Really Costs Money After You Buy a Car

The sticker price is only the beginning. According to AAA, the average annual cost of owning a car is $12,297, or about $1,025 per month. This total includes depreciation, insurance, fuel, maintenance, registration, and taxes. Most owners focus only on the car payment and gas, then face surprises when everything else arrives. Depreciation alone accounts for about 38% of your total ownership costs, averaging $4,680 per year as new cars lose roughly 20% of their value in the first year and 60% over five years.

Insurance and State-Specific Costs

Insurance costs average $1,715 annually, though rates vary dramatically by state and driving record. Florida drivers face the highest hidden costs at $8,483 per year, driven largely by insurance premiums, while New Hampshire owners spend just $4,472 annually because there’s no statewide vehicle sales tax. Fuel runs about 14.90 cents per mile, maintenance costs 10.13 cents per mile, and registration and licensing fees average $815 per year. State taxes on your car purchase also vary wildly. California charges about 7.25%, which means $1,841 in sales tax on a $25,395 car, while Washington state charges just 0.3% or about $76. These numbers add up quickly, and they’re only averages, meaning your actual costs could be significantly higher or lower depending on where you live, what you drive, and how much you drive.

Maintenance and Repair Surprises

Maintenance and repairs are the hidden costs that hurt most. Routine maintenance averages around $900 per year, but this varies wildly by brand. A Honda owner might spend $583 annually while a Porsche owner pays $1,623. Specific repairs become expensive fast: brake pad replacement costs about $342 per wheel, four new tires run roughly $907, and a battery replacement averages $414. The real shock comes when major repairs hit-engine replacement runs $5,000 to $10,000 or an EV battery replacement costs $4,000 to $18,000. A prepurchase inspection costs only about $200 but can reveal looming expensive repairs before you buy.

Mileage and Insurance Inflation

Mileage also drives costs higher. Wyoming drivers log 21,575 miles annually on average, which increases both gas and maintenance expenses compared to drivers in states with lower average mileage. Insurance premiums continue to rise, making it harder to predict your long-term ownership budget. These rising costs compound over time, affecting your overall expenses. Understanding these cost drivers helps you anticipate what you’ll actually pay each month and year, which sets the stage for building a realistic budget that accounts for both predictable expenses and the surprises that catch most owners off guard.

Breaking Down Monthly and Annual Car Expenses

Fuel, insurance, maintenance, and taxes form the backbone of your monthly car expenses. Understanding each one separately helps you spot where your money goes. Fuel costs around 13.00 cents per mile, which translates to roughly $1,560 annually if you drive the national average of 12,000 miles per year at current gas prices near $3.14 per gallon. The real variable here is your actual mileage and your vehicle’s fuel efficiency, not gas prices alone. Someone driving 20,000 miles yearly in a truck will spend significantly more than a hybrid driver covering 10,000 miles, so calculate your personal fuel budget based on your typical annual mileage and your car’s MPG rating rather than relying on national averages.

Insurance premiums average $756 per year for full coverage nationwide, but this number masks enormous regional differences. The five most expensive states for full-coverage insurance are New York, Louisiana, Florida, Nevada, and Michigan, where premiums often exceed $3,000 annually, while Idaho, Vermont, Maine, Hawaii, and Indiana average under $1,800 per year according to Quadrant Information Services data. Your specific rate depends on your age, driving record, vehicle type, and deductible choices, so get quotes from multiple insurers rather than accepting the first offer.

Maintenance and repairs average $900 annually but vary dramatically by brand, with Honda owners typically spending $583 per year while owners of luxury brands like Porsche pay $1,623 or more. Registration, licensing, and state taxes add another $815 annually on average, though this varies wildly by location. California’s 7.25% sales tax on a $25,395 vehicle costs $1,841 in year one, while Washington state charges only 0.3% or about $76.

Fuel consumption varies more than you think

Your actual fuel spending depends almost entirely on how many miles you drive each year, not on fluctuating gas prices. Someone in Wyoming averaging 21,575 miles annually will spend far more on fuel than someone in a state with lower average mileage, even if gas prices are identical. Track your real mileage for three months, multiply by four to estimate your annual total, then multiply that by your current gas price divided by your vehicle’s MPG to get an accurate figure. This matters because it’s the one expense you can directly influence through your driving habits and vehicle choice.

Insurance premiums require active shopping

Insurance is the largest single ownership expense, and most people pay too much simply because they never shop around. Get quotes from at least three insurers every two years, even if you’re happy with your current coverage, because rates change constantly and new discounts appear regularly. Your deductible choice directly affects your premium, so test whether raising your deductible from $500 to $1,000 saves enough annually to make sense given your emergency savings. If you drive under 10,000 miles yearly, ask about low-mileage discounts explicitly, as many insurers don’t advertise these without prompting.

Maintenance costs compound over time

Routine maintenance like oil changes (around $164), tire rotations (about $134), and basic inspections (roughly $253) happen predictably, but major repairs arrive unexpectedly. Budget $900 annually for routine maintenance and repairs based on your vehicle’s age and brand, then build a separate emergency fund for the expensive surprises that will eventually arrive. Brake pad replacement costs about $342 per wheel, four new tires run roughly $907, and battery replacement averages $414, but these hit sporadically rather than monthly. If you bought a used car, a prepurchase inspection costing about $200 reveals potential expensive repairs before you own the vehicle, making this one of the best investments you can make.

With these four expense categories mapped out, you now have a foundation for understanding what you’ll actually pay. The next step involves taking this knowledge and building it into a personal ownership cost plan that accounts for your specific situation and protects you from financial surprises.

Build Your Ownership Cost Plan

The gap between knowing your expenses and actually tracking them determines whether you stay financially stable or get blindsided by bills. Start with a spreadsheet or a dedicated budgeting app that separates fixed costs from variable ones. Fixed costs-insurance, registration, and licensing-stay roughly the same each month, so calculate these annually and divide by twelve to get your true monthly baseline. Variable costs like fuel and maintenance fluctuate, which means you need actual data from your own driving, not national averages. Track every fuel purchase for three months, note every maintenance visit and repair, then multiply by four to project your annual total. This real-world data beats guessing because your specific vehicle, driving habits, and local climate create unique patterns. Someone who drives mostly highway miles in mild weather spends far less on maintenance than someone doing stop-and-go city driving in harsh winters where road salt accelerates rust and battery drain.

Set Up Your Tracking System

A simple spreadsheet works best for most owners. List your fixed costs (insurance, registration, licensing) on one line and divide each by twelve to see your monthly baseline. Create separate columns for fuel, maintenance, and repairs, then fill in actual expenses as they occur. After three months, multiply your fuel and maintenance totals by four to estimate your annual spending. This approach reveals your true costs far better than relying on national averages, which may not match your situation at all.

Plan for Major Repairs and Replacements

Major repairs and replacements deserve their own category in your budget because they arrive unpredictably but devastate finances when they hit without warning. These expenses typically cluster between years three and seven of ownership, so if you own a car past that timeframe, assume you’ll face at least one significant repair. Build a separate emergency fund starting now-even $50 monthly adds up to $600 annually, which covers most common repairs before they become financial crises. If your vehicle is five years old or older, increase this to $100 monthly because older cars need more frequent expensive work. For newer cars under warranty, your emergency fund can stay smaller since the manufacturer covers major failures.

Follow Your Maintenance Schedule Religiously

Track maintenance intervals from your owner’s manual and complete each service on time. Ignoring engine oil maintenance jeopardizes your vehicle’s performance and puts you at risk for significant repair costs and potential breakdowns. Skipping oil changes or delaying brake inspections transforms small problems into catastrophic ones. Your specific vehicle, driving habits, and local climate create unique maintenance patterns that only your owner’s manual can accurately predict.

Final Thoughts

Car ownership costs feel overwhelming when you first add them up, but they become manageable once you stop guessing and start tracking. Your ownership costs checklist transforms abstract numbers into concrete monthly and annual figures tied to your actual situation. You now understand that depreciation, insurance, fuel, maintenance, and taxes form the backbone of what you’ll spend, and you know how your state, vehicle type, and driving habits shift these costs up or down.

Taking control requires three straightforward actions. Set up your tracking system this week using a spreadsheet or budgeting app, then fill in your fixed costs and track variable expenses for the next three months. Build your emergency repair fund starting now, even if you can only contribute fifty dollars monthly, and follow your maintenance schedule without exception because skipping services transforms small problems into expensive failures that derail your entire budget.

We at LifeEventGuide understand that major life transitions like buying a car require more than just knowing the numbers. Our Decide-Protect-Execute-Review approach helps you move through car ownership with confidence by defining your goals, setting realistic timelines, and building accountability into every step.


Publisher’s Note: LifeEventGuide is an independent educational publisher. Some articles reference tools or services we recommend to help readers explore options related to major life transitions. Learn more about how we make recommendations here.

Closing Costs Checklist: Understand and Plan Your Home Purchase Expenses

You’re about to spend hundreds of thousands of dollars on a home, but closing costs often catch buyers off guard. These final expenses-ranging from lender fees to title insurance-can add 2% to 5% of your purchase price to your bill at closing.

At LifeEventGuide, we’ve created this closing costs checklist to help you understand exactly what you’ll pay and where you can negotiate. By breaking down each fee line by line, you’ll walk into closing day prepared and confident.

What You’ll Actually Pay at Closing

Closing costs are the fees and expenses you pay to finalize your home purchase, separate from your down payment. They cover everything from lender origination charges to title insurance, property taxes, and attorney fees. On a $400,000 home, you’ll typically pay between $8,000 and $20,000 in closing costs-that’s 2% to 5% of your purchase price. The exact amount depends on your loan type, location, and which costs the seller agrees to cover. Mortgage closing costs for a single-family property averaged $6,905 in 2021, a 13.4% annual increase, but this varies dramatically by state. Washington, D.C. averaged $29,888 in closing costs that year, while Missouri averaged just $2,061. The difference comes down to transfer taxes and local recording fees, which some states impose and others don’t.

How State and Local Fees Shape Your Total

Transfer taxes and recording fees create massive regional differences in what you’ll owe. A buyer in New York faces significantly higher closing costs than one in North Dakota, not because of lender fees but because of state-imposed transfer taxes. Understanding this range early prevents the shock many buyers experience when their lender provides the final bill three days before closing.

Why Closing Costs Hit Your Budget Hard

Most buyers focus on their down payment and monthly mortgage but overlook closing costs entirely. You’ll receive a Loan Estimate within three business days of applying for your mortgage, which shows estimated closing costs, but many fees increase by closing day. Your loan origination fee alone-typically 0.5% to 1% of your loan amount-could run $2,500 to $5,000 on a $500,000 mortgage. Add title insurance, appraisal fees, property taxes, homeowners insurance premiums, and prepaid interest, and the bill compounds quickly.

Seller Concessions: A Negotiation Tool, Not a Guarantee

The Zillow Group Consumer Housing Trends Report 2024 found that 43% of sellers paid some closing costs and 24% paid all of them, meaning you might negotiate seller concessions to reduce your share. However, relying on the seller to cover costs leaves you vulnerable if negotiations fail, so budget as if you’re paying the full amount yourself. Understanding each fee category helps you identify which costs you can negotiate and which ones remain fixed-a distinction that becomes critical when you review your Loan Estimate and prepare for closing day.

Breaking Down Your Closing Costs Line by Line

Lender Fees: Your Largest Single Expense

Your lender’s origination fee stands as the single largest closing cost you’ll encounter, typically running 0.5% to 1% of your loan amount. On a $500,000 mortgage, that’s $2,500 to $5,000 just for the lender to process and underwrite your loan. This fee is one of the most negotiable charges on your closing statement-shop it across at least three lenders before committing. You’ll also pay a credit report fee (usually $25 to $75) and an appraisal fee (typically $300 to $700), both non-negotiable but worth confirming upfront so no surprises appear on your Loan Estimate.

When you request quotes from lenders, ask each one to itemize their origination fee separately from any discount points or rate adjustments, as some lenders bundle fees in ways that obscure the true cost.

Title, Recording, and Property Protection

Title insurance protects you and your lender against ownership disputes or liens on the property; expect to pay $500 to $2,500 depending on your home’s price and location. This is one fee you should absolutely shop around for, as title insurance rates vary significantly between providers in your area. Recording fees, paid to your county to officially register the deed and mortgage, range from $50 to $300 and depend entirely on where you’re buying.

Demand a written breakdown showing which fees are lender charges versus third-party costs like appraisal or title work; this transparency makes it far easier to compare offers side-by-side. If a lender can’t justify a fee or won’t lower it, another lender will.

Prepaid Costs and Escrow Accounts

Prepaid property taxes and insurance are prorated at closing based on your purchase date-if you close mid-month, you’ll prepay the seller’s share of taxes and insurance through month-end, then those costs roll into your monthly escrow payment. On a $400,000 home, prepaid property taxes and insurance can easily add $3,000 to $5,000 to your closing bill.

Escrow accounts, where your lender holds funds for future property taxes and insurance payments, typically require two months of prepaid amounts at closing-on a home with $300 monthly escrow, that’s $600 due at closing, but this money isn’t wasted since it covers your actual obligations later. Add a 10–15% contingency line to your budget to protect against surprise costs that emerge during the final walkthrough or inspection.

Attorney Fees and Local Variations

Attorney fees, required in many states like Illinois, typically run $500 to $1,500 and vary by location and complexity; some attorneys charge flat fees while others bill hourly, so clarify this during your initial consultation.

The critical move is requesting your Loan Estimate and reviewing it line-by-line within three days of application, then comparing identical fees across lenders. Don’t settle for vague explanations about why one lender charges significantly more than another. With each fee category now clear, you can identify which costs you can negotiate and which ones remain fixed-a distinction that becomes essential when you prepare your strategy for reducing your total bill.

How to Estimate, Negotiate, and Reduce Your Closing Costs

Request Your Loan Estimate and Compare Across Lenders

Submit your mortgage application and request your Loan Estimate within three business days. Then immediately request identical estimates from at least two other lenders. The Loan Estimate shows exactly what each lender will charge, making side-by-side comparison straightforward. Your origination fee, the largest negotiable item on the statement, typically ranges from 0.5% to 1% of your loan amount-on a $500,000 mortgage, that’s $2,500 to $5,000, and you can absolutely shop this fee across lenders. Some lenders will match or beat a competitor’s rate to win your business, particularly if your credit score is strong and your debt-to-income ratio is healthy. Don’t accept the first offer; the Mortgage Bankers Association data shows origination costs increased 13.2% year over year as market conditions tightened, meaning lenders have room to negotiate when they want your business.

Shop for Title Insurance and Verify Standard Fees

Title insurance represents your second major opportunity to save money-rates vary dramatically between providers in your area, so request quotes from at least three title companies before closing. Recording fees, credit report fees, and appraisal fees are largely locked in by location and market rates, but confirm these amounts match what competing lenders quote; if one lender’s appraisal fee is $700 and another charges $400 for the same service, that’s a red flag worth investigating. Demand a written breakdown showing which fees are lender charges versus third-party costs like appraisal or title work; this transparency makes it far easier to compare offers side-by-side.

Review Your Closing Disclosure and Catch Fee Increases

The Closing Disclosure review arrives at least three business days before your closing date, and this is your final opportunity to catch errors or unexpected fee increases. Federal regulations limit how much certain costs can increase between the Loan Estimate and Closing Disclosure, so if your origination fee jumped from $3,000 to $3,500 without explanation, push back immediately and demand justification or a credit. Compare the Closing Disclosure with your Loan Estimate line-by-line and ask your lender to explain any differences.

Negotiate Seller Concessions and Calculate Prepaid Costs

Negotiate with your seller to cover a portion of your closing costs-Zillow’s 2024 data shows 43% of sellers paid some costs and 24% paid all of them, so this isn’t an unusual request. On a $400,000 home, asking the seller to cover $4,000 to $6,000 in closing costs is entirely reasonable, particularly if you’re offering a strong offer price or closing quickly. Prepaid property taxes and insurance are non-negotiable but predictable; calculate these amounts yourself using your county’s tax assessor website and your homeowners insurance quote so you know exactly what to expect. Some lenders offer lender credits that reduce your upfront costs (by accepting a higher interest rate), which makes sense only if you plan to stay in the home long enough to recoup the higher monthly payments through the lower closing costs.

Prepare for Closing Day with Your Final Walkthrough

Walk through the home one final time before closing to confirm no surprise repairs or issues emerged that might affect your insurance or appraisal value. Bring your exact cash-to-close amount via wire transfer or cashier’s check on closing day-personal checks are not accepted. Organize all required documents and bring a photo ID to verify your identity for everyone on the mortgage.

Final Thoughts

Closing costs represent a significant but manageable expense when you understand what you’re paying for and where you have leverage. The 2% to 5% range you’ll encounter on your home purchase isn’t fixed-your origination fee, title insurance, and seller concessions all offer real opportunities to reduce your final bill. Request your Loan Estimate early, compare offers across at least three lenders, and review your Closing Disclosure line-by-line before closing day to catch errors and negotiate effectively.

The most common mistake homebuyers make is treating closing costs as an afterthought. Build them into your budget from the start, calculate prepaid property taxes and insurance yourself using your county assessor’s website, and negotiate seller concessions as part of your offer. On a $400,000 home, the difference between paying $8,000 and $15,000 in closing costs comes down to the decisions you make during the mortgage shopping phase and your willingness to push back on fees that don’t match market rates.

Your closing costs checklist should include itemized fee breakdowns from each lender, confirmation of which costs are negotiable versus fixed, and a final walkthrough to catch surprises before closing day. We at LifeEventGuide understand that home buying involves dozens of decisions across timelines and budgets, and our publisher recommendations provide a structured framework to guide you through major life transitions like this one.


Publisher’s Note: LifeEventGuide is an independent educational publisher. Some articles reference tools or services we recommend to help readers explore options related to major life transitions. Learn more about how we make recommendations here.

Pet Supplies Checklist: Essential Gear for Your New Pet

Bringing a new pet home is exciting, but it also means preparing your space with the right supplies. We at LifeEventGuide know that first-time pet owners often feel overwhelmed by how much gear they actually need.

This pet supplies checklist breaks down exactly what matters, from food bowls to toys, so you can focus on settling in with your new companion instead of second-guessing your purchases.

What Your New Pet Actually Needs to Eat and Where to Sleep

Choose the Right Food and Water Bowls

The feeding setup you establish from day one prevents digestive upset and sets your pet on a stable routine. Stainless steel or ceramic bowls outperform plastic because they resist bacteria growth and last longer, making them easier to sanitize between meals. Plastic bowls harbor odors and bacteria even after washing, which matters more than most people realize. Separate your pet’s food and water bowls to prevent contamination, and if you have a larger dog, elevated feeders reduce strain on their neck and joints during meals.

Select Age-Appropriate Food

Ask your veterinarian or the pet’s previous caregiver about the specific food type and feeding frequency, since switching foods too quickly causes digestive issues that lead to expensive vet visits. Most puppies need three to four meals daily until around six months old, then transition to twice daily feeding, while kittens typically need three meals a day until four months. Age-appropriate food matters more than brand loyalty-look for foods that list meat as the first ingredient and avoid fillers. Budget roughly 20 to 40 dollars monthly for a medium-sized dog and 15 to 25 dollars for a cat, though premium or specialized diets can cost significantly more.

Compact checklist of feeding frequency by age and monthly food budget ranges for dogs and cats

Create a Safe Sleeping Space

Your new pet needs a dedicated sleeping space that feels safe and separate from activity areas. Choose a comfortable, washable bed placed in a quiet corner away from household traffic, which helps your pet feel secure during adjustment. Many owners buy two identical beds to rotate between washing and drying, keeping one available at all times. Puppies especially benefit from crates lined with blankets, since they naturally seek enclosed spaces and crates aid house-training by creating a designated resting area.

Size Your Crate Correctly

Make sure the crate is large enough for your pet to stand and stretch fully but not so spacious that they can eliminate in one corner and sleep in another. For cats, a quiet bedroom corner or a low-traffic area works well, and some cats prefer elevated beds or perches where they can observe their surroundings. Place bedding away from direct sunlight and heating vents to keep the temperature moderate. Add a blanket or towel that carries your scent to comfort your pet during the first weeks, signaling that this space is part of their new family.

Invest in Proper Setup

The investment in proper bedding and feeding stations, while modest upfront, prevents behavioral problems and health issues that would cost far more to address later. With your pet’s basic nutrition and rest needs covered, you can now focus on the health and safety measures that protect them from injury and illness.

Keeping Your Pet Safe and Healthy

Establish Proper Identification

Your pet’s safety starts with identification before they leave home. A collar with an ID tag is non-negotiable, not optional. Under The Control of Dogs Order 1992, you must display your name and address on your dog’s collar tag, and adding a phone number makes reuniting with a lost pet far more likely. Proper identification for lost pets includes both a microchip and a collar name tag with all your dog’s information. Choose a collar that fits snugly enough that you can fit two fingers between it and your pet’s neck-too loose and they slip free, too tight and it restricts breathing.

For puppies and kittens, start with adjustable collars from brands like Li’l Pals that grow with them, then upgrade to a properly fitted collar as they mature. Cats need breakaway collars that release under pressure to prevent strangulation if they catch on something. The ID tag itself should display your current phone number and address in clear, readable text. Replace the tag if your contact information changes, since an outdated number defeats the entire purpose.

Checkmarked list of identification and collar best practices for dogs and cats - pet supplies checklist

Choose the Right Leash and Harness

Pair the collar with a leash suited to your pet’s size and strength-a small cat harness differs completely from a large dog leash. Introduce puppies to harnesses early so they accept them without resistance. For dogs, attach the leash to a secure D-ring on the collar, never to a weak attachment point that could fail during a walk.

Build a First Aid Kit

A pet first aid kit prevents minor injuries from becoming emergencies that require costly vet visits. Stock it with bandages, antiseptic spray, tweezers for splinter removal, and any medications your veterinarian prescribes. Keep enzyme cleaner on hand for accidents, since regular cleaners don’t eliminate odors that encourage repeat incidents in the same spot.

Maintain Regular Grooming

Grooming prevents health problems before they start. Brush your pet regularly based on coat type-daily for long-haired pets, weekly for short-haired ones-and focus on areas behind ears, between toes, and around eyes where mats and tangles hide. Trim nails every three to four weeks, or more often if they click on floors, since overgrown nails cause pain and joint problems.

Light-coated dogs need high-factor sun cream on exposed areas like ears during sunny days. Bathe your pet only when truly dirty, not weekly, using pet-specific shampoo on a non-slip bath mat. Teeth care matters too-use canine toothpaste and a dog-safe toothbrush to brush regularly and prevent gum disease that leads to tooth loss. Safari offers professional-grade grooming tools for at-home use, while Li’l Pals provides puppy and kitten grooming kits sized appropriately for young pets.

Schedule Your First Veterinary Visit

Schedule your first veterinary visit within the first week of bringing your pet home to establish a baseline health record, discuss vaccination schedules, plan for flea and tick prevention, and arrange microchipping with current contact information. With your pet’s health and safety measures in place, you can now focus on the items that keep them mentally stimulated and emotionally comfortable in their new home.

Toys, Scratching Posts, and Why Your Pet’s Mental Health Matters

Provide the Right Toys for Mental Stimulation

Mental stimulation prevents destructive behavior far more effectively than punishment ever will. A bored pet chews furniture, scratches walls, or knocks things off tables out of pure frustration. Coastal Turbo, Li’l Pals, and Rascals toy collections offer options matched to your pet’s energy level and size, so a low-energy senior cat needs something completely different from a high-drive puppy. Rotate toys weekly to maintain novelty without spending constantly-your pet’s brain responds to variety, not quantity.

For dogs, include fetch toys, chew toys, and interactive puzzle toys that dispense treats when manipulated correctly. Kittens and cats need climbing structures and scratching posts because scratching controls their stress levels and keeps their claws sharp and healthy. If you skip scratching posts, your furniture becomes the target.

Choose Safe Toys and Avoid Hazards

Select toys without small parts that could become choking hazards and avoid sticks or golf balls for dogs, since these cause serious internal injuries when swallowed. For puppies specifically, teething toys ease the discomfort of erupting teeth and redirect the urge to chew away from your belongings. Puppies will chew through soft rubber toys, so supervise plush toys closely and remove them if they start tearing. Hard rubber toys and nylon chews last longer and withstand aggressive chewing.

Hub-and-spoke diagram showing core enrichment practices for dogs and cats - pet supplies checklist

Use Interactive Toys for Problem-Solving

Interactive puzzle toys keep your pet’s mind engaged for 15 to 30 minutes at a time, which is far more valuable than passive toys they ignore. Some puzzle toys hide treats inside compartments that your pet must figure out how to open, creating problem-solving challenges that mimic natural foraging behavior. This type of engagement satisfies your pet’s instincts while preventing boredom-related destruction.

Position Scratching Posts Strategically

Place scratching posts in high-traffic areas where your cat naturally spends time, not hidden in a corner they never visit. Vertical space matters enormously for cats-a cat tree or wall-mounted shelves let them observe their territory from above, which reduces anxiety significantly. Cats feel safer when they can survey their environment from elevated positions.

Create a Dedicated Resting Space

A comfortable resting area separate from playtime space gives your pet a retreat when they feel overwhelmed or tired. This doesn’t need to be expensive-a quiet corner with a washable bed works perfectly. Many pets feel safest in their crate with the door open, since it becomes their den rather than a punishment space. Provide access to this resting area during the day, not just at night, since rest is essential for growth and emotional regulation.

Final Thoughts

You don’t need to spend a fortune to get pet ownership right, and the essentials form the foundation of responsible care. Proper food and water bowls, age-appropriate nutrition, a safe sleeping space, identification, basic grooming supplies, and toys for mental stimulation prevent behavioral problems, health issues, and the stress that comes from feeling unprepared. Monthly food costs typically range from 15 to 40 dollars depending on your pet, and initial setup costs for bedding, bowls, and basic supplies usually fall between 150 and 300 dollars.

Before your new pet arrives, walk through your home and complete your pet supplies checklist to ensure you have everything in place. Stock food and water bowls, prepare bedding, set up a crate or safe space, gather toys, assemble your first aid kit, locate a veterinarian, and schedule that first appointment within the first week. Remove hazards like toxic plants, secure loose wires, and block access to unsafe areas with baby gates so your pet stays protected from day one.

Getting a pet is a major life transition that benefits from the same thoughtful planning you’d apply to moving or buying a home. We at LifeEventGuide help people navigate significant life changes by breaking them into manageable steps with clear timelines and checklists, and our structured planning framework guides you through defining goals, protecting yourself from common mistakes, and executing your plan calmly. Your new pet is counting on you to create a safe, comfortable home, and with these supplies in place, you’re ready to welcome them with confidence.


Publisher’s Note: LifeEventGuide is an independent educational publisher. Some articles reference tools or services we recommend to help readers explore options related to major life transitions. Learn more about how we make recommendations here.

Utility Setup Checklist Moving: Organize Essentials Before You Unpack

Moving to a new home means handling dozens of tasks at once. Getting your utilities connected properly should be at the top of your list, since electricity, water, and internet are non-negotiable on day one.

At LifeEventGuide, we’ve created this utility setup checklist for moving to help you stay organized and avoid costly delays. Follow our timeline and you’ll have everything running smoothly before you even unpack a box.

Which Utilities Need Your Immediate Attention

Electricity and gas rank as your first priority because without them, your home won’t function on day one. Contact your local electricity provider at least two weeks before moving to schedule activation. Most providers require your new address, move-in date, and a valid ID to open an account. If you’re moving within the same service area, ask whether you can transfer your existing account instead of creating a new one-this often speeds up the process and avoids duplicate deposits.

Electricity and Gas Setup

Gas setup follows the same timeline as electricity, though some areas use natural gas while others rely on propane tanks. Take meter readings on your move-in day and photograph them to prevent billing disputes. The average household spends around $138 monthly on electricity and $85 on gas, so accurate initial readings protect your budget from the start. Set up automatic payments with your provider to avoid late fees and missed deadlines.

Water and Sewer Connections

Water service requires contact with your city or water district, not a private company like electricity. Call at least two weeks ahead to arrange new service or a transfer. Ask about any deposits or connection fees upfront-some municipalities charge 50 to 200 dollars for new accounts. Schedule a final meter reading at your old home and a baseline reading at your new address on move-in day. This protects you from paying for water used by previous tenants and establishes your usage baseline for future bills.

Test all faucets and toilets on arrival to confirm water pressure and drainage work properly. Sewer service is often bundled with water, but verify this with your provider since some areas bill them separately. Locate your main water shut-off valve immediately upon arrival so you can respond quickly to emergencies.

Internet and Phone Service

Internet installation should be scheduled four to six weeks before moving if possible, especially in areas with limited provider options or high demand during peak moving season. Installation typically requires a technician visit lasting one to three hours, and availability windows can be tight. Confirm your new address’s internet availability before signing a contract-some rural areas have limited options.

Ask about fixed versus variable rates and contract terms, as early termination penalties can reach 150 to 300 dollars. Try to schedule installation for your move-in day or the day after so you’re not without connectivity while unpacking. Phone service through a mobile carrier requires no special setup, but if you’re transferring a landline, contact your provider two weeks ahead. With these essential utilities activated, you’re ready to tackle the next critical step in your moving timeline.

When to Contact Each Utility Provider

Start contacting utility providers six weeks before your move, not two weeks. Most people wait too long and miss installation windows, especially for internet, which has the longest lead times. Call your electricity and gas providers first since they activate remotely most easily. Most can schedule service within five to seven business days once you provide your new address and move-in date. Water and sewer services require more time because they’re municipal and often involve account setup at city offices. Contact your water district at least three weeks out to avoid the common mistake of arriving on move-in day without service activated. Internet providers need contact six to eight weeks ahead during peak moving season from May through September. Availability windows fill up fast, and some technicians book solid two months in advance. When you call, ask about installation costs, which typically range from 75 to 150 dollars, and whether they offer discounts for autopay setup. Request a move-in day or next-day installation window so you’re not waiting weeks for connectivity while unpacking.

When to contact each provider before moving - utility setup checklist moving

Verify Your Appointments Two Weeks Before Moving

Two weeks before moving, you should have already scheduled electricity, gas, water, and internet. Now verify each appointment by calling providers back to confirm technician arrival times and any access requirements they need. Ask whether you need to be home during installation or if they can access the meter alone. For water service, confirm whether you need to attend a meter inspection or if the city handles it remotely. Request written confirmation of all scheduled dates and times so you have documentation if something goes wrong. Start gathering required documents now: government ID, Social Security number, proof of residency for your new address, and your lease or closing papers if applicable. Some providers conduct credit checks that take three to five business days, so don’t delay this step.

Schedule Disconnections at Your Old Home

Contact your old utility providers and request disconnection dates for one to two days after your move-out date, not on your move-out day itself. This overlap prevents gaps and gives you time to pack without rushing. Set up autopay with at least one utility now to establish the system before bills arrive. Most providers offer 5 to 10 dollar monthly discounts for autopay enrollment, which adds up to 60 to 120 dollars annually.

Test Everything on Move-In Day

On move-in day, your first task after arriving is testing utilities, not unpacking boxes. Turn on faucets in the kitchen, bathroom, and laundry area to confirm water pressure and check for leaks around pipes. Flush every toilet to verify drainage works and watch the tank refill without running continuously. Flip light switches throughout the home and plug in a lamp to confirm electricity is working. If lights flicker or outlets feel warm to the touch, contact your electricity provider immediately as this indicates a wiring problem. Smell your gas appliances and around the meter for any rotten-egg odor, which signals a potential gas leak. If you detect gas smell, leave the home immediately and call your gas company from outside. Test your internet connection by connecting a device to the router and loading a website to confirm the technician completed installation correctly.

Monitor Your First Bills Carefully

During your first week, take meter readings for electricity, gas, and water on day one and photograph them. Send these readings to your providers within 24 hours to establish your baseline and prevent billing disputes. Check your first bills carefully when they arrive, comparing the meter readings you photographed against what the provider billed. Utility billing errors happen in roughly 5 to 10 percent of accounts, so verification protects your account from overcharges. Within the first 30 days, review your bills against your expected costs based on the provider’s estimates. If usage is significantly higher or lower, contact the provider to adjust your budget billing plan or investigate potential leaks or equipment problems. Once your utilities are running smoothly and your bills are verified, you can shift focus to the next major task: setting up your home’s safety systems and addressing any maintenance issues that need attention before you settle in completely.

Mistakes That Cost Time and Money During Utility Setup

Disconnecting Too Early or Too Late at Your Old Address

Utility setup mistakes compound quickly during a move. The most damaging error occurs when you disconnect service at your old address on the wrong date. Most people either disconnect too early, leaving themselves without utilities while still packing, or forget to disconnect entirely and end up paying for an empty home for weeks. Contact your previous utility providers at least three weeks before moving and explicitly request disconnection for two to three days after your move-out date, not on move-out day itself. This overlap prevents service gaps and gives you flexibility if packing runs late.

Write down confirmation numbers and scheduled disconnection dates in a single document you can reference on moving day. Many providers charge 25 to 50 dollars monthly for service you’re not using, so a two-week billing error costs 50 to 100 dollars in wasted money. Request written confirmation of disconnection dates via email so you have proof if a provider bills you incorrectly afterward.

Underestimating Internet Installation Lead Times

Internet installation represents the second critical mistake area, and it’s the most common reason people face connectivity delays after moving. Many households underestimate how far in advance internet providers book appointments, especially during peak season from May through September when technicians schedule solid two months out. Waiting until two weeks before moving almost guarantees you won’t have service on day one. Contact internet providers six to eight weeks before your move, not four weeks.

Ask specifically about appointment availability for your exact move-in date and try for the earliest possible window. Some providers offer next-day or same-day installation if you book early enough, while others have minimum wait times of three to four weeks. Installation costs typically range from 75 to 150 dollars, and some providers waive fees if you commit to autopay, saving you money immediately.

Overlooking Local Municipal Requirements and Permits

The third mistake involves overlooking local municipal requirements that vary dramatically by location. Some cities require permits before water service activation, while others impose impact fees or demand proof of residency before opening accounts. Call your city or county clerk’s office at least four weeks before moving to ask about any permits, fees, or documentation requirements specific to your new address.

Some municipalities require in-person visits to establish water or sewer accounts, which you can’t handle remotely. Failing to complete this step delays service by weeks and forces you to arrange temporary water access. A few areas charge connection fees of 200 to 400 dollars that you won’t discover until you call, so budget accordingly. Document every requirement the city mentions and check them off as you complete them, since missing even one document can restart the entire process.

Final Thoughts

Your utility setup checklist for moving works because it transforms a chaotic process into a series of concrete actions with clear deadlines. Start contacting providers six weeks before you move, verify all appointments two weeks out, and test every utility on arrival. This timeline prevents the three mistakes that derail most moves: disconnecting service too early at your old home, underestimating internet installation lead times, and overlooking local municipal requirements that vary by location.

On move-in day, test water pressure, electrical outlets, and gas appliances before you unpack anything. Take meter readings and photograph them immediately so you have proof of your baseline usage for billing disputes. Within 30 days, review your first utility bills against the provider’s estimates and set up autopay to avoid late fees while securing the 5 to 10 dollar monthly discounts most providers offer.

We at LifeEventGuide created event-specific checklists and timelines to help you organize major life transitions like moving with clear goals and budgets. Use this utility setup checklist as your foundation, and you’ll move into your new home with confidence and without the stress of scrambling for basic services.


Publisher’s Note: LifeEventGuide is an independent educational publisher. Some articles reference tools or services we recommend to help readers explore options related to major life transitions. Learn more about how we make recommendations here.

Eco Friendly Moving Checklist: Green, Efficient, and Organized

Moving doesn’t have to harm the environment. We at LifeEventGuide believe that planning a sustainable move is practical, cost-effective, and straightforward.

This eco-friendly moving checklist walks you through every step, from deciding what to pack to coordinating your logistics responsibly. You’ll reduce waste, save money, and arrive at your new home with a clear conscience.

Plan Your Move with Sustainability in Mind

Sustainability starts with intention, not impulse. The moment you decide to move, you face a critical choice: declutter first or pack everything. Decluttering before packing is non-negotiable if you care about reducing waste. The average household moves 11.2 times in a lifetime according to U.S. Census data, and each move creates an opportunity to shed items you no longer use. Walk through your home and sort ruthlessly. Items in good condition go to Goodwill or Habitat for Humanity ReStore, which diverts hundreds of thousands of pounds from landfills annually. Sell what has resale value on Facebook Marketplace or eBay-this keeps items in circulation rather than in a truck headed to a landfill. Recycle or discard the rest. This step alone reduces moving volume by 20–40 percent, which directly lowers transportation emissions and packing material waste. A smaller move costs less money and requires fewer resources.

Select a Moving Company That Prioritizes the Environment

Not all moving companies prioritize the environment, and you should hold them accountable. Gentle Giant recycles materials annually and sources moving boxes made from 90 percent post-consumer recycled materials. They also use biodegradable foam peanuts and oxo-biodegradable bubble wrap that degrade into water and carbon dioxide. When you contact moving companies for estimates, ask three specific questions:

Two key sustainability statistics from the guide: recycled-content boxes and damage reduction from proper packing. - eco friendly moving checklist

What percentage of your boxes contain recycled content? Do you have a carbon offset program? What happens to materials after a move? If a company can’t answer these questions clearly, move on.

Explore Reusable Box Options

You can rent reusable plastic moving boxes from U-Haul’s Ready-To-Go Box program, which uses high-density polyethylene boxes designed for repeated use across hundreds of locations in the U.S. and Canada. These boxes nest when empty and require no tape or assembly, making packing faster and cleaner than cardboard. Another option is Earth-Friendly Moving Kits, which deliver sustainably sourced boxes and packing supplies to your door within 2–3 business days, with free shipping across the USA.

Set a Realistic Timeline

A realistic timeline prevents panic purchasing of single-use plastics and excessive packing materials. Try to start planning at least four to six weeks before moving day. This buffer gives you time to source reusable boxes from local grocery stores, bookstores, or Facebook Marketplace rather than purchasing new cardboard. A rushed move creates waste; a planned move creates options. With these foundational decisions in place, you’re ready to tackle the next phase: identifying what materials you actually need and where to find them without generating unnecessary waste.

How to Source and Reuse Materials Without Overspending

Find Free or Low-Cost Boxes in Your Community

Reusing boxes and packing materials cuts waste and costs simultaneously. Contact local grocery stores, bookstores, and liquor shops-they discard dozens of sturdy boxes weekly and will often set them aside if you ask. UsedCardboardBoxes, North America’s largest processor of used shipping boxes, reports that purchasing once-used boxes achieves up to double recycling rates compared to new cardboard. If you prefer convenience, Earth-Friendly Moving Kits deliver sustainably sourced boxes plus complete packing supplies within 2–3 business days with free USA shipping. This approach eliminates the need to purchase new cardboard while supporting a circular economy.

Cushion Fragile Items with What You Already Own

Skip bubble wrap entirely and use towels, blankets, old clothes, and linens from your closet instead-items you’re moving anyway. If you need additional filler, biodegradable packing peanuts reduce long-term contamination of soil and waterways, unlike Styrofoam which persists in landfills for centuries. Paper-based packing tape replaces plastic tape and serves the same function without environmental compromise.

Checklist of sustainable packing substitutions to reduce plastic and waste during a move. - eco friendly moving checklist

Gentle Giant uses oxo-biodegradable bubble wrap that degrades and fragments, proving that effective materials don’t require environmental sacrifice. Suitcases, laundry baskets, and plastic storage bins you already own function as moving containers-maximize their use before purchasing anything new.

Turn Unwanted Items Into Revenue or Community Support

Decluttering before packing creates a secondary benefit: items in good condition become revenue or community support. Facebook Marketplace and eBay move thousands of used household goods daily, keeping them circulating instead of heading to disposal. Goodwill and Habitat for Humanity ReStore accept furniture, appliances, and tools in working condition and have diverted millions of pounds from landfills. List items for sale or donation at least three weeks before moving day to avoid last-minute scrambling.

Establish a Recycling Plan for Moving Day

After you’ve sorted what stays and what goes, establish a clear recycling plan for moving day itself. Break down cardboard boxes immediately and place them in curbside recycling or contact local waste facilities about bulk cardboard drop-off. Many communities offer free recycling events specifically for moving materials. Gentle Giant recycles 80,000–100,000 pounds of materials annually by collecting mattress bags, box springs, and packing supplies separately rather than mixing them with general trash. This structured approach transforms a chaotic final day into an organized handoff where every material has a designated destination. With your materials sourced responsibly and your recycling plan in place, you’re ready to pack strategically and coordinate the logistics that will complete your green move.

Execute Your Green Move Efficiently

Packing efficiency determines how many boxes you need, which directly impacts transportation emissions and material waste. Start by categorizing items by room and frequency of use rather than randomly filling boxes. Heavy items like books belong in small boxes that one person can safely lift; lighter items like bedding and clothing go in larger boxes to maximize space without creating unsafe weight. Properly packed boxes reduce damage by 30 percent, which means fewer replacement purchases and less waste after arrival. Maximize every container you already own before opening a single new box. Suitcases, storage bins, laundry baskets, and even drawers from dressers serve as moving containers when wrapped securely. Fill gaps in boxes with soft items you’re moving anyway-towels, clothes, linens-rather than purchasing filler material. This approach simultaneously reduces the number of boxes needed and eliminates the temptation to buy packing supplies you don’t need.

Label Everything Clearly to Prevent Damage and Chaos

Clear labeling prevents unpacking chaos and protects items from damage during transit. Label each box on at least two sides with the room destination and primary contents using a permanent marker or labels you’ve created digitally and printed at home. Include fragile warnings on boxes containing breakables so movers handle them carefully. This system takes 30 seconds per box but prevents the scramble of opening multiple containers searching for specific items, which wastes time and creates unnecessary handling that damages contents.

Coordinate Logistics to Reduce Fuel Consumption

Coordinate your logistics strategically to minimize driving distance and fuel consumption. If hiring a moving company, request a fuel-efficient route that consolidates stops rather than backtracking through neighborhoods. Contact your utility providers, postal service, and service subscriptions at least two weeks before moving day so you avoid making return trips to your old address. If you’re renting a truck for a DIY move, choose the smallest vehicle that fits your belongings rather than oversizing, which wastes fuel and increases your carbon footprint unnecessarily.

Final Thoughts

An eco-friendly moving checklist transforms your move into an organized, intentional process that protects the environment without requiring sacrifice. Decluttering cuts moving volume by 20–40 percent, which directly reduces transportation emissions, while reusing boxes and packing materials from sources like Earth-Friendly Moving Kits eliminates single-use plastics. Clear labeling prevents damage and unpacking chaos, and these steps compound into meaningful environmental impact.

A sustainable move creates habits that extend far beyond moving day itself. You establish recycling systems, donation networks, and mindful consumption patterns that reduce waste in your new home, and your choices as a customer signal market demand for sustainable options that influence how the moving industry operates. Gentle Giant’s annual recycling of 80,000–100,000 pounds of materials demonstrates what becomes possible when moving companies prioritize environmental responsibility.

Three concise steps to organize a sustainable move timeline and materials.

Start four to six weeks before moving day, contact local businesses for free boxes, and establish your recycling plan early. We at LifeEventGuide recommend exploring our publisher recommendations for additional frameworks and checklists that help you define goals, timelines, and budgets with confidence as you navigate this transition.


Publisher’s Note: LifeEventGuide is an independent educational publisher. Some articles reference tools or services we recommend to help readers explore options related to major life transitions. Learn more about how we make recommendations here.

Introducing Pet to Home: A Gentle Guide for New Pet Arrivals

Bringing a new pet into your home is exciting, but it also requires thoughtful preparation. The first few days matter most-how you handle them shapes your pet’s confidence and comfort for months to come.

At LifeEventGuide, we’ve created this guide to walk you through introducing your pet to home step by step. You’ll learn how to prepare your space, manage those critical first days, and build a strong bond with your new companion.

Preparing Your Home Before Your Pet Arrives

Identify and Remove Hazards

Your home needs to be ready before your pet walks through the door. Start by walking through each room and identify hazards your pet could encounter. Electrical cords, toxic plants like lilies and sago palms, cleaning products stored under sinks, and small objects that could be swallowed all pose real risks. If you have a puppy, assume it will chew anything within reach-secure wires, remove access to medications, and store chemicals in locked cabinets. For cats, ensure windows have secure screens and that no toxic plants sit on accessible shelves.

Checklist of key actions to remove pet hazards before arrival - introducing pet to home

Research from the MDPI Animals journal shows that many adopted dogs arrive with incomplete behavioral histories, so you won’t know every trigger or sensitivity your pet might have. This means your home setup must account for unknowns.

Create a Safe Initial Space

Designate one small, quiet room as your pet’s initial space-a bedroom, bathroom, or laundry room works well. This room becomes their safe zone during the transition and prevents overwhelm from having the entire house available at once. Set up stainless steel bowls in this space for food and water; these materials reduce bacteria buildup compared to plastic. Place a comfortable, washable bed in a corner where your pet can retreat. A crate or carrier serves double duty as both a safe retreat and a training tool. Stock this room with toys appropriate to your pet’s age, but avoid anything with small parts that could be choking hazards. Keep grooming essentials nearby-a brush suited to your pet’s coat, nail clippers, and pet-safe shampoo.

For cats specifically, set up a litter box with scoopable litter in a low-sided design that allows easy access, positioned away from their food and water bowls. Install a scratching post in this initial space to redirect natural scratching instincts before furniture gets damaged.

Set Boundaries Throughout Your Home

For the rest of your home, create clear boundaries. Use baby gates to block off rooms you’re not ready to open yet, and apply double-sided tape to furniture or surfaces you want to protect. This isn’t temporary-adopters frequently implement safety boundaries long-term, according to MDPI Animals research, especially in the first three to six months when trust is still developing.

Gather Supplies and Plan for Family Interactions

Gather supplies before day one arrives: a collar with an ID tag for dogs, a leash for walks, age-appropriate food (consult your veterinarian about the best diet for your specific pet), and pet-friendly cleaning products for accidents. If you have children, set up a plan for supervising interactions from day one. Teach children to approach slowly, avoid direct eye contact, and never disturb your pet while eating or sleeping. Schedule a free initial physical exam with a veterinarian soon after arrival to catch any health issues early and establish baseline care.

With your home prepared and supplies in place, you’re ready to welcome your new companion. The first days at home will test your preparation, but they’ll also reveal how your pet responds to their new environment-information that shapes everything you do next.

The First Days: Creating Calm and Routine

Your pet’s first week at home determines whether they feel safe or anxious during the months ahead. Research shows most pets take time to trust their new owners, but that trust begins in those initial days when your pet learns whether this new home is predictable and secure. The 3-3-3 rule, widely used by shelters and adoption organizations, breaks this timeline into phases: three days to decompress, three weeks to settle into routine, and three months to feel truly at home. This means your job in week one is not to socialize your pet or teach commands-it’s to create an environment so calm and predictable that your pet’s nervous system can begin to relax.

Keep Your Pet in Their Safe Room

Keep your new companion in that initial safe room you prepared, even if they seem ready to explore. Resist the urge to show them around the house or invite friends over to meet them. Your pet is already processing enormous change: new smells, new people, new sounds, new territory. Add structure by feeding at the same time each day, taking dogs outside on a consistent schedule for bathroom breaks, and maintaining quiet during evening hours.

Hub-and-spoke chart explaining the 3-3-3 rule: 3 days, 3 weeks, 3 months

If you have a dog, take them out first thing in the morning, after meals, before bedtime, and every two to three hours in between-accidents are normal and expected during this transition. Use the same door each time and the same outdoor spot when possible; this repetition helps your pet understand the routine and builds confidence.

Let Your Pet Set the Pace for Interaction

Keep interactions low-pressure during these first days. Let your pet approach you rather than pursuing them for cuddles or play. Some pets hide for several days, and that’s healthy-they regulate their stress response through withdrawal. Avoid forcing interaction or picking up your pet unless necessary. Reward calm behavior with treats and gentle praise, but don’t overwhelm them with enthusiasm. If you have children, supervise every interaction and keep sessions brief.

Anticipate Behavioral Changes

Expect behavioral surprises during this phase. According to research from Powell et al. published in Scientific Reports, seven to twenty percent of adopted shelter dogs are returned after adoption, with a large share returning in the first month, often because adopters didn’t anticipate how their pet would actually behave in a home setting. Your dog might be fearful, destructive, or surprisingly different from their shelter personality. This is normal. Shelter environments mask true behavior, so your pet’s actual temperament emerges once they feel safe enough to show it.

Begin Gradual Exploration

After three to five days, when your pet seems calmer and eats regularly, start short, leashed room tours of your home, always returning to the safe room afterward. This gradual exposure prevents overwhelm while satisfying curiosity. Watch your pet’s body language closely-a tucked tail, flattened ears, or reluctance to move forward means slow down. Your patience now prevents months of anxiety later. As your pet grows more comfortable with their immediate surroundings, the next phase of bonding can truly begin, shifting from survival mode to connection.

Building Trust Through Consistency and Patience

Trust forms through repetition, predictability, and your pet learning that you do what you say you’ll do. McGreevy’s 2009 research on human-dog bonds identifies consistency as the cement holding relationships together. This means feeding at exactly the same time each morning, walking the same route, using the same commands, and responding to your pet’s signals the same way every time. Your pet’s brain maps patterns right now. When you feed at 7 a.m. every day, your pet’s body prepares for food at 6:55 a.m. When you always use the back door for bathroom breaks, your pet stops checking the front door. When you stay calm during accidents or mistakes, your pet learns failure isn’t catastrophic.

Establish Three Core Daily Routines

Start with three non-negotiable daily routines: a morning walk or outdoor break, a midday feeding and play session, and an evening wind-down period with quiet time in their safe space. Keep these times within thirty minutes of each other every single day for at least the first three months.

Compact ordered list of the three daily routines that strengthen trust - introducing pet to home

Your pet’s nervous system calibrates to this rhythm, and stress naturally decreases as their body learns what comes next. This consistency matters more than any treat or toy.

Use Specific, Timely Rewards

Positive reinforcement works, but timing and specificity matter more than frequency. When your dog sits calmly instead of jumping, reward that exact moment with a treat or praise within two seconds. When your cat uses the litter box instead of the carpet, mark that success immediately. Generic praise like “good dog” teaches nothing; specific feedback like “yes, gentle” when your pet touches your hand softly teaches them exactly which behavior you want repeated. MDPI Animals research shows many adopters train dogs themselves using shelter guidance rather than hiring professionals, which works fine when you focus on marking the exact behavior you want.

Avoid rewarding fearful behavior with excessive comfort-this can actually reinforce anxiety. If your dog trembles during thunderstorms and you rush over with treats and coddling, you’ve taught them that trembling produces rewards. Instead, act normally, offer a treat only if they approach you, and reward calm behavior when it appears.

Manage Multi-Pet Introductions Carefully

For multi-pet homes, feed animals separately in different rooms for at least the first month. This removes competition stress and lets each pet feel secure during meals. Introduce your new pet to resident pets only when your new arrival shows calm, relaxed body language around the closed door where the other pet lives. Start with scent swapping-exchange bedding between pets-before any face-to-face meeting.

When introductions happen, keep them short, supervised, and in neutral territory like a hallway rather than in one pet’s established space. Watch for stiff postures, raised hackles, or intense staring, and separate immediately if tension rises. Multiple short, successful meetings build positive associations far better than one long, stressful encounter.

Set Clear Boundaries and Enforce Them Consistently

Research from MDPI Animals shows adopters frequently implement long-term safety boundaries, especially around feeding areas and sleeping spaces. Set these boundaries now and maintain them consistently. If your dog sleeps on the bed, that’s fine, but decide this now and stick with it-don’t allow it sometimes and forbid it other times. If cats aren’t allowed on kitchen counters, use deterrents consistently every single day.

Children should follow identical rules with your pet as you do. If one family member allows jumping on the couch and another doesn’t, your pet becomes confused and trust deteriorates. Have a family meeting before your pet arrives and establish three house rules everyone follows without exception. This clarity prevents conflict and helps your pet feel genuinely safe, which is the actual foundation of bonding.

Final Thoughts

The first three months of introducing a pet to home matter far more than most people realize. Within the first week, your pet should eat regularly and show calm behavior in their safe room-this signals their nervous system is settling. Within three weeks, they’ll likely follow basic routines without anxiety and may start approaching you for interaction. Within three months, most pets feel genuinely at home and trust their new owners enough to show their true personality.

Watch for warning signs that professional help is needed. If your pet shows severe anxiety, aggression toward family members, or destructive behavior that doesn’t improve after two months of consistent routine, contact a veterinarian or certified trainer. Behavioral problems are common relinquishment drivers, according to MDPI Animals research, but they’re also manageable with proper support. Many adopters successfully train dogs themselves using shelter guidance, though some situations require one-on-one professional training.

Schedule that initial veterinary exam within the first week and keep all follow-up appointments. Your vet catches health issues early and provides baseline care that prevents problems later. The patience you show during these first weeks compounds into a bond that weathers every challenge ahead, and that foundation is solid.


Publisher’s Note: LifeEventGuide is an independent educational publisher. Some articles reference tools or services we recommend to help readers explore options related to major life transitions. Learn more about how we make recommendations here.

Pre Move Tasks Checklist: Get Your Move Setup Right From Day One

Moving day stress often starts weeks before the truck arrives. The difference between a smooth transition and a chaotic one comes down to preparation, and that’s where a solid pre-move tasks checklist makes all the difference.

We at LifeEventGuide have seen firsthand how families who plan ahead experience far less moving day anxiety. This guide walks you through the essential steps to organize your move from start to finish.

Create a Moving Timeline and Set Clear Goals

Start planning three months ahead

The moment you know your move date, work backwards from that day to build a realistic timeline. This backward planning forces you to identify what actually needs to happen and when, rather than hoping things fall into place.

Survey highlights of moving-related stress in the United States, 2024

Set your move date first, then mark the critical checkpoints: when you need to book movers (ideally eight weeks before), when utilities must be arranged (four weeks prior), when you should finish packing (one week before), and when your address change takes effect (same day or one day after arrival). A 2024 survey found that 82 percent of Americans consider moving one of life’s most stressful experiences, with 42 percent reporting they cried during the process-but most of that stress stems from poor timing, not the move itself.

Build your budget early and stick to it

Your moving budget needs to account for truck rental or professional movers, deposits and first month’s rent, utility setup fees, address change services, and supplies like boxes and tape. If you hire professional movers, prices spike during peak season from May through September; booking early locks in better rates and availability. Set aside at least 500 dollars as an emergency fund for unexpected costs (a broken item, a last-minute storage need, or a utility deposit that’s higher than expected). Track every expense in a spreadsheet or moving binder from day one, including estimates from moving companies, quotes for utilities, and packing supply costs. This prevents sticker shock and shows you where money actually goes. If your budget feels tight, start selling items you don’t need immediately; Facebook Marketplace and Craigslist move items quickly and put cash in your pocket before moving day arrives.

Identify the decisions that unlock everything else

Beyond the move date itself, certain decisions control the entire timeline. When does your current lease end or your house sale close? When does your new job start or your new lease begin? When must schools receive notification for your children? When should you request time off work? Write these dates down and build your checklist around them. For example, if your new apartment becomes available on the fifteenth but your current lease ends on the first, you need temporary storage or a flexible move-in arrangement-that’s a decision to make now, not on moving day. If you move for a job, coordinate your move-in date with your start date; most people underestimate how much time they need to settle in before their first day. Create a dedicated moving binder or spreadsheet with columns for task, deadline, assigned person (if applicable), and status. Update it weekly so nothing falls through the cracks, and you’ll have a clear picture of what comes next: sorting through your belongings and deciding what actually makes the trip to your new home.

Organize Your Current Home and Decide What to Take

Start decluttering 8-12 weeks before moving day

Most people move too much stuff. The average American home contains about 300,000 items, and moving all of them costs real money-whether you pay a mover by the pound or rent a truck by the day. Go room by room and make three piles: keep, sell, and donate. Be ruthless about this decision. If you haven’t used something in the past year and it doesn’t serve a clear purpose in your new space, it goes. Clothes you outgrew, kitchen gadgets collecting dust, books you’ll never reread-these items cost you money to move and take up space in your new home.

Convert clutter into moving funds

Facebook Marketplace and Craigslist move items fast; list things with photos and competitive pricing, and you’ll convert clutter into moving funds. You can also advertise on Facebook Marketplace, put up signs in your area directing people to your sale, and offer electronic payment options like Cashapp or PayPal. Donate what doesn’t sell to Habitat for Humanity’s ReStore or local charities within two weeks of your move date so you don’t store items in your new home.

Create a master inventory as you sort

Number each box or container and record what goes inside using a simple spreadsheet with columns for box number, room destination, and contents. This system prevents the chaos of unpacking mystery boxes and helps you locate items quickly in your new home. Photograph furniture and large items before packing to document their condition, which protects you if damage claims arise during the move. Keep this inventory accessible on moving day-print it out or save it to your phone-so you can verify that boxes arrive at the correct rooms.

Pack strategically to protect your belongings and back

Heavy items like books and kitchen equipment go into smaller boxes to keep weight under 50 pounds; this protects your back and makes boxes easier to move through doorways. Use plastic storage bins instead of cardboard boxes for items you might need to access during unpacking, since bins stack better and reveal contents at a glance.

Compact checklist of must-have items for the first 24–48 hours after a move - pre move tasks checklist

Set aside an essentials box with toiletries, medications, chargers, snacks, a change of clothes, and basic cleaning supplies for your first 24 to 48 hours in the new home-this box arrives last on the truck but gets opened first. With your belongings sorted and packed strategically, you’re ready to tackle the administrative side of your move.

Handle Administrative and Logistical Tasks

Notify key parties about your move immediately

The moment you lock in your move date, notify your employer, landlord, and key service providers. Your employer needs at least two weeks’ notice to adjust your work arrangements or, if you’re relocating for a job, to coordinate your start date with your move-in window. Contact your current landlord or mortgage servicer to confirm your move-out date and schedule a final walkthrough; many leases require 30 to 60 days’ notice, and missing this deadline can cost you your security deposit. File a USPS Change of Address form at least two weeks before moving day-this costs nothing online and automatically redirects mail for up to 12 months. Update your address with your bank, credit card companies, insurance provider, and any subscription services within one week of moving; delays here can cause missed bills or misdirected statements.

Transfer medical and vehicle records

Contact your doctor, dentist, and pharmacy to transfer medical records to providers near your new home, especially if you take regular medications. Reach out to your vehicle insurance company to update your address and adjust coverage based on your new location; rates often change depending on your zip code, and you’re legally required to maintain coverage.

Central hub of moving administration with key tasks surrounding it - pre move tasks checklist

Update your voter registration through your state’s election office, and if you own a vehicle, schedule a DMV appointment to update your driver’s license and vehicle registration after you move-these updates usually take two to four weeks and require an in-person visit.

Book movers and arrange utilities early

Professional movers may offer savings when booked in advance, and peak season from May through September fills up fast. Obtain written estimates from at least three companies, ask about insurance options, and verify they’re licensed by checking the Federal Motor Carrier Safety Administration database. Schedule utilities to be transferred or activated on your move-in date-electricity, water, gas, and internet should all be confirmed one week before arrival to avoid spending your first night without power or heat. Many utility companies require a deposit if you’re a new customer, so budget an extra 200 to 400 dollars for these setup fees.

Confirm internet installation and final details

Contact your internet provider separately; residential broadband installation typically takes five to seven business days, so schedule this early and confirm an installation window. These administrative tasks (address changes, utility transfers, and service updates) run parallel to your packing and decluttering efforts, so tackle them consistently throughout your pre-move period rather than waiting until the final week.

Final Thoughts

Pull out your moving binder or spreadsheet and scan through it one final time to check off what you’ve completed and confirm all deadlines remain accurate. Verify your mover appointment details one week before moving day, confirm utility installation windows, and mark off notifications to your employer and landlord. This 30-minute review prevents last-minute scrambling and ensures your pre-move tasks checklist stays on track.

Moving is a major life transition, and the stress you feel often reflects how prepared you actually are. The families who move smoothly aren’t the ones with perfect circumstances-they’re the ones who planned ahead and followed through on their commitments. Your first night in the new home doesn’t need to be perfect; it just needs to be functional, and you’ve already done the hard work by reading this guide and starting your checklist.

Start tackling your remaining tasks today rather than waiting until next week. We at LifeEventGuide understand that major life transitions feel overwhelming without a clear roadmap, which is why our event-specific checklists and planning framework help you move through changes calmly and confidently by defining your goals, timeline, and key decisions upfront.


Publisher’s Note: LifeEventGuide is an independent educational publisher. Some articles reference tools or services we recommend to help readers explore options related to major life transitions. Learn more about how we make recommendations here.

Home Buying Budget Checklist: Set Your Price Range and Stay On Track

Buying a home is one of the biggest financial decisions you’ll make, and it’s easy to feel overwhelmed by the numbers. We at LifeEventGuide know that having a clear home buying budget checklist helps you stay confident and in control throughout the process.

This guide walks you through calculating what you can afford, understanding the real costs involved, and tracking your finances every step of the way.

Know Your Financial Foundation Before House Hunting

Calculate What You Can Put Down

Before you determine what price range makes sense, you need an honest picture of where you stand financially. List everything in your savings account and calculate how much you can realistically put toward a down payment.

Key down payment thresholds and PMI impacts for U.S. homebuyers

The standard advice says to try for 20% down to avoid private mortgage insurance, but that’s not realistic for everyone. A 3% down payment is the minimum many lenders accept, though it triggers PMI costs that add roughly $100–$200 monthly to your mortgage on a $250,000 home.

If you have $7,500 saved for a $250,000 purchase, that’s only 3% down. If you have $50,000 saved, you hit the 20% threshold and skip PMI entirely. The difference between these two scenarios means paying thousands more in PMI over time, so knowing your exact savings number forces you to make a real choice about what you can afford right now versus what you might afford later.

Understand How Your Credit Score Affects Your Rate

Your credit score can help you qualify for a lower interest rate, and even small rate differences compound into tens of thousands of dollars over 30 years. A borrower with a 760+ credit score might qualify for a 6.2% rate, while someone with a 620 score could face 7.8% on the same loan amount. On a $200,000 mortgage, that 1.6% difference means roughly $200 more per month.

If your credit score is below 700, seriously consider spending the next few months paying down debt and disputing any errors on your credit report before applying for a mortgage. This step alone can save you significant money over the life of your loan.

Calculate Your Debt-to-Income Ratio

Your debt-to-income ratio tells lenders what percentage of your gross monthly income goes toward existing debts plus the new mortgage payment. Most lenders cap this at 43% of gross income for conventional loans, though some FHA loans allow different ratios. If you earn $7,500 monthly and already pay $1,500 toward a car loan and student loans, you have $3,225 left for a mortgage payment (43% of $7,500).

That $3,225 monthly payment translates to roughly a $550,000 loan, but property taxes, insurance, and PMI will consume part of that budget, shrinking your actual home price. Calculate your current debts honestly, subtract them from 43% of your gross income, and you’ll know exactly how much mortgage payment you can handle without lenders rejecting you. With these three numbers in place-your down payment savings, your credit score, and your debt-to-income capacity-you’re ready to determine what price range actually works for your situation.

What Price Range Can You Actually Afford

Apply the 28/36 Rule to Your Situation

The 28/36 rule gives you a straightforward way to find your maximum affordable price, though the math requires honesty about your actual monthly obligations. Take your gross monthly income and multiply it by 0.28 to find the maximum you should spend on housing costs alone (mortgage, property taxes, insurance, and PMI). If you earn $7,500 monthly, that’s $2,100. Multiply your gross income by 0.36 to find the absolute ceiling for all debt payments combined, which gives you $2,700.

Visual guide to 28% housing, 36% total debt, and 43% DTI cap for affordability - home buying budget checklist

This second number matters because lenders will reject you if your total monthly obligations-car loans, student debt, credit cards, plus the new mortgage-exceed 43% of gross income on conventional loans.

Calculate What Your Debt Leaves for a Mortgage

Start with your current monthly debt payments. If you’re paying $400 toward a car loan and $300 toward student loans, you have $2,000 left for your mortgage before hitting the 36% threshold. That $2,000 payment on a current mortgage rate of around 6.5% translates to roughly a $300,000 loan, but closing costs, property taxes, and insurance will reduce what you can actually spend on the home itself.

Account for the Hidden Housing Costs

The real trap is treating the mortgage payment as your only housing cost. Property taxes vary wildly by location, so a $250,000 home costs far less monthly in Pittsburgh than in Memphis. Homeowners insurance typically runs about $35 monthly for every $100,000 of home value, meaning a $300,000 home adds roughly $105 to your monthly payment. If you put down less than 20%, PMI adds another $100–$200 monthly depending on your loan size.

Factor in HOA Fees and Local Variations

HOA fees, which can range from $100 to $500+ monthly in some communities, must come out of that 28% housing budget, not be added on top. Calculate your actual property tax rate by checking your county assessor’s website, get a homeowners insurance quote from at least two providers, and confirm whether the neighborhood has HOA fees before deciding on a price range. A $300,000 home in one area might consume 32% of your income while the same payment in another area hits 38% once you factor in taxes and insurance. The difference between staying comfortably within your budget and stretching too far often comes down to these three costs, not the mortgage payment alone. With your actual price range now defined by local expenses and your debt capacity, you’re ready to track every cost that appears between now and closing day.

Tracking Costs Before You Close

List Every Expense from Offer to Closing

The home buying process generates expenses long before you sign final paperwork, and most buyers underestimate how much they’ll spend between making an offer and closing day. A home inspection costs $300–$500, an appraisal runs $400–$600, and title search fees add another $200–$400.

Common U.S. homebuying expenses from offer to closing with typical dollar ranges - home buying budget checklist

Closing costs can range from less than 1 percent to nearly 3 percent of your home’s sale price, meaning a $300,000 home triggers significant lender fees, title insurance, appraisal, and attorney costs. Beyond these predictable expenses, you’ll face moving costs ranging from $1,500 for a local move to $5,000+ for long distance, plus immediate home needs like furniture, paint, and appliance replacements.

Create a spreadsheet right now and list every expense you’ve already paid toward this purchase. Add inspection, appraisal, and closing cost estimates based on your target price range. Then add realistic moving costs and first-month home setup expenses. Most buyers report spending $3,000–$8,000 on these day-one costs alone, so this isn’t theoretical padding-it’s money that leaves your account before you ever make a mortgage payment.

Separate Your Down Payment from Closing Costs

Your approved mortgage amount doesn’t account for the actual cash you need on hand at closing. Your lender might approve you for a $300,000 loan, but if you’ve exhausted your savings on the down payment with nothing left for closing costs and moving, you’ll either lose the home or take on debt right when you’re taking on a mortgage. Set aside closing costs separately from your down payment funds starting today.

If you’re putting 5% down on a $250,000 home, that’s $12,500, plus roughly $5,000–$12,500 in closing costs, plus $3,000–$5,000 in moving and setup. You need at least $20,500–$30,000 liquid before you make an offer, not just the down payment amount. Once you’re in contract, expenses accelerate. The inspector finds issues, the appraisal might come in low forcing renegotiation, and the title search uncovers problems that cost money to resolve.

Plan for Unexpected Costs and Final Verification

Stop assuming your budget is locked in once you’re approved. Instead, plan for 10–15% in additional expenses beyond your closing cost estimate, and keep that buffer in a separate savings account untouched until you close. Two weeks before closing, your lender will provide a Closing Disclosure statement showing your exact final costs.

Compare this line-by-line against your initial estimate and your budget. If costs have climbed beyond what you anticipated, you still have time to ask your lender for clarification or negotiate with the seller to cover certain fees (inspection repairs, title issues, or appraisal shortfalls). Never sign closing documents without understanding every charge, and never proceed if the final numbers push you into financial strain.

Final Thoughts

Your home buying budget checklist now contains every number that matters: your down payment savings, your debt-to-income ratio, your maximum monthly payment, and all costs between now and closing day. Pull out your spreadsheet and compare what you planned against what actually occurs in your situation. If your credit score improved since you started, you might qualify for a better rate, but if unexpected expenses drained your savings, you may need to adjust your price range downward or delay your purchase.

The next steps depend on where you stand financially right now. If your numbers are solid and your finances are stable, move forward with getting pre-approved by a lender-this transforms your budget from theory into a concrete loan amount that sellers will take seriously. If gaps exist between your budget and your financial reality, address them now rather than during closing (pay down high-interest debt, boost your credit score, or save longer for a larger down payment).

Keep your home buying budget checklist accessible throughout the entire process and reference it when you’re tempted to stretch beyond your price range or when unexpected costs appear. We at LifeEventGuide understand that major life transitions like buying a home require more than just a budget-they need a complete framework to guide you through every decision, and our event-specific checklists and playbooks help you avoid common mistakes and complete this transition calmly.


Publisher’s Note: LifeEventGuide is an independent educational publisher. Some articles reference tools or services we recommend to help readers explore options related to major life transitions. Learn more about how we make recommendations here.

Moving Checklist Printable: Quick Access Tools for a Smooth Move

Moving day can feel overwhelming when you’re juggling packing, logistics, and finances all at once. We at LifeEventGuide know that having the right tools makes the difference between chaos and calm.

A moving checklist printable gives you a clear roadmap for every stage of your move. This guide walks you through packing strategies, timeline planning, and cost management so nothing gets missed.

How to Pack and Track Everything Without Losing Your Mind

Start with a Room-by-Room Strategy

Packing room by room is the only approach that actually works, and you should start four weeks before moving day. Most people pack randomly, mixing items from different rooms into single boxes, which creates chaos during unpacking. Instead, commit to finishing one room completely before moving to the next. This method reduces decision fatigue because you focus on a contained space rather than your entire home. A general guideline suggests number of boxes needed for apartment move, so overestimate slightly rather than cramming items unsafely into fewer boxes.

Create a Labeling System That Works

The labeling system you choose determines whether unpacking takes days or weeks. Label each box with three pieces of information: the destination room, the contents, and a box number that corresponds to a master inventory. This inventory prevents you from opening every box searching for your coffee maker or winter boots. Use color-coded markers or stickers assigned to each room-kitchen boxes in blue, bedroom in red, bathroom in green-so you spot them instantly during unloading.

Quick checklist to pack, label, and track boxes efficiently

Handle Fragile Items and Valuables Carefully

Fragile items require extra attention during packing. When packing fragile items safely, wrap dishes individually in packing paper or towels, use towels and linens as padding instead of buying bubble wrap, and fill empty spaces in boxes with soft items so nothing shifts during transport. For valuable antiques or items you’re uncertain about moving, obtain written appraisals for valuable items before moving so you have documentation for insurance purposes. Electronics should be photographed before you unplug them, and keep all manuals and warranties accessible so you can reconnect items correctly at your new home.

Pack an Essentials Box for Immediate Needs

Pack a separate essentials box with clothes for a few days, toiletries, phone chargers, and medications-items you’ll need immediately when you arrive-and keep this box in your car rather than on the moving truck. This box ensures you have what matters most within arm’s reach on day one, while everything else travels on the moving truck.

With your boxes labeled, inventoried, and organized by room, you now need to coordinate the timing and logistics of getting everything to your new home.

Timeline and Logistics Planning

Start Planning Six to Eight Weeks Out

The difference between a smooth move and a stressful one comes down to starting early and knowing what needs attention at each stage. You should start planning six to eight weeks before your move, not three weeks out like many people assume. Starting this early lets you secure preferred moving dates, lock in better rates, and avoid the panic of last-minute scrambling.

Get Quotes and Set Your Budget

At the six-week mark, your first task is getting accurate quotes from at least three moving companies. Research their credentials through the U.S. Department of Transportation if they’re handling an interstate move, and never book based on price alone-verify their availability for your specific date and ask what their full-service options include. Simultaneously, create a detailed moving budget that accounts for the mover’s fee, packing supplies, utility deposits, address-change services, and a buffer for unexpected costs. 80% of people underestimated moving costs and needed additional money to fund their move, so add a safety margin to your initial estimate.

Percentage of people who misjudge moving budgets - moving checklist printable

Handle Utilities and Address Changes Four Weeks Out

Four weeks before moving day, contact your utility providers and schedule disconnection at your current address and activation at your new one. Coordinate these dates carefully so you have electricity, gas, water, and internet on your arrival day-gaps in service create real problems on day one. This is also when you should file your change-of-address form with the USPS and notify banks, insurance companies, subscription services, employers, and healthcare providers of your new address. Many people delay this step and end up missing important mail or having services interrupted.

Confirm Details Two Weeks and One Week Before

Two weeks out, confirm your moving company with complete addresses and multiple contact numbers, then reconfirm again one week before. This prevents misunderstandings about pickup times or access restrictions. If your building requires elevator reservations or parking permits for the moving truck, secure these now rather than discovering they’re unavailable on moving day.

Prepare Appliances and Electronics One Week Before

One week before your move, prepare appliances by unplugging them, defrosting refrigerators if you’re moving them, and disconnecting gas or propane items safely. Take photos of electronics setups and decals before unplugging so you know how to reconnect everything. Disassemble furniture that can come apart, keep hardware in labeled bags, and remove light bulbs so they don’t break in transit. With your timeline locked in and logistics confirmed, you can now focus on the financial side of your move and identify where you can cut unnecessary costs.

Money Management During Your Move

Request Detailed Quotes and Track Every Expense

Moving costs spiral quickly when you don’t track expenses from the start. Most people discover hidden fees only after signing with a mover, which means they’ve already committed to a price that doesn’t reflect reality. Start your budget six weeks out by requesting quotes from at least three moving companies and asking for a detailed breakdown of every charge-transportation, packing materials, labor, fuel surcharges, and insurance. Never accept a phone quote as final; insist on an in-home or virtual walkthrough so the estimate accounts for actual items you’re moving. The American Moving & Storage Association reports that the average cost of a local move ranges from $2,000 to $5,000, while long-distance moves average $4,000 to $8,000, but these figures shift dramatically based on distance, volume, and season.

Your budget should include the mover’s fee plus packing supplies ($200 to $500 for most homes), utility deposits at your new address, USPS change-of-address fees, and a 10% buffer for unexpected costs. Many people forget to budget for items like mattress covers, wardrobe boxes, and specialty boxes for dishes, which add $100 to $300 depending on how many you need. Create a spreadsheet listing every anticipated expense and track actual costs as you spend them-this prevents surprise overdrafts and shows where money is going.

Identify Hidden Fees Before They Surprise You

Hidden fees appear in places most people don’t anticipate. Long-distance movers often charge extra for stairs, narrow hallways, or limited parking at either location, so mention these details when requesting quotes. If your new building requires elevator reservations or has access restrictions, those fees fall on you, not the mover. Storage costs typically range from $35 to $100 per month depending on unit size. Utility deposits typically range from $100 to $300 per service, and some utilities charge reconnection fees. Pet transport, vehicle shipping, and appliance disconnection services each carry separate charges.

Compact list of common hidden moving costs - moving checklist printable

Cut Costs Through Strategic Decisions

To reduce costs meaningfully, declutter aggressively four weeks before moving because you pay for every cubic foot the mover transports. Selling unwanted items online covers some moving expenses while eliminating weight. Packing yourself instead of paying for full-service packing saves $1,000 to $3,000 on most moves, though this requires starting early and dedicating significant time. Moving during off-peak seasons (fall and winter) and mid-week instead of weekends can reduce mover rates by 10% to 20%. Some employers offer moving assistance or reimbursement, and military families may qualify for discounted rates through official channels. Ask moving companies directly about any available discounts, corporate partnerships, or bundle deals that combine services at lower overall cost.

Final Thoughts

A moving checklist printable transforms what feels like an impossible task into a series of manageable steps. Success comes from starting early, organizing by room, tracking costs carefully, and confirming details at each stage. The real power of a checklist lies in the structure that prevents forgotten tasks and reduces the mental load of coordinating dozens of moving pieces simultaneously.

Your work shifts after you arrive at your new home, though it doesn’t stop entirely. Unpack your essentials box first, then prioritize bedrooms and bathrooms so your family has basic comfort on day one. Update your address with banks, insurance companies, healthcare providers, and your state’s DMV within the first week, and register to vote in your new location.

We at LifeEventGuide offer event-specific checklists and guidance to help you avoid common mistakes and complete your move calmly. Your moving checklist printable is your first tool, and using it consistently transforms a stressful relocation into a smooth transition to your new home.


Publisher’s Note: LifeEventGuide is an independent educational publisher. Some articles reference tools or services we recommend to help readers explore options related to major life transitions. Learn more about how we make recommendations here.

Offer Decision Checklist: Decide When to Move Forward or Walk Away

Receiving an offer is exciting, but it’s also the moment when clarity matters most. You need to know exactly what you’re agreeing to and whether it truly fits your situation.

We at LifeEventGuide created this offer decision checklist to help you move through this choice with confidence. Whether you’re evaluating a job offer, a purchase agreement, or any major commitment, this guide walks you through the key questions that separate good decisions from ones you’ll regret.

Understanding Your Offer and Terms

Read Every Word of Your Offer Document

Start by reading every word of your offer document, not just the headline numbers. Most people focus on salary or purchase price and miss critical details buried in the fine print. If you’re evaluating a job offer, check whether the salary figure is base pay only or if it includes bonuses, stock awards, or commission structures. Write down each component separately so you can see what you’re actually receiving.

Checklist of offer components to separate and review

For purchase agreements, verify whether the quoted price includes closing costs, inspection fees, or contingencies. This separation reveals the true financial commitment you face. Small details-like whether the seller covers certain inspections or whether you absorb all closing costs-shift your actual out-of-pocket expense significantly.

Identify What Matters Most to You

Not every offer component has equal weight in your life. If you have young children, flexible work arrangements might matter more than a 5 percent salary bump. If you’re buying a home, property tax rates and insurance costs in your specific area matter far more than national averages.

Factors contributing to job satisfaction include working conditions, compensation, and opportunities for advancement, so if your offer includes manager information, assess that relationship carefully. For salary negotiations, Salary.com and Glassdoor let you benchmark your offer against market rates for your specific role, location, and experience level. If your offer falls below market range, that’s actionable data for negotiation. If it exceeds market range but includes unusual restrictions (like non-compete clauses or travel requirements), weigh whether those trade-offs justify the higher pay.

Calculate the Real Financial Impact

Your financial picture deserves honest analysis before you commit. Calculate the real cost or benefit of the offer against your current situation and your budget. If you’re changing jobs, factor in any gap in income, health insurance costs during transitions, and whether retirement contributions reset.

If you’re making a major purchase, stress-test your budget by setting aside a small amount each month for regular maintenance and unexpected repairs. Consult Salary.com to understand whether benefits like health insurance, retirement matching, and paid time off are competitive for your industry and location. If the offer requires you to relocate, calculate commuting costs, housing costs in the new area, and whether your salary increase actually improves your financial position after those expenses.

Red flags include vague compensation structures where you can’t calculate what you’ll actually earn, or offers that require you to cover costs upfront with promises of reimbursement later. Those situations create financial risk you may not absorb easily. Once you understand what you’re actually receiving and what it costs, you need to measure this offer against the goals and timeline you set before the opportunity arrived.

Evaluating Fit Against Your Goals and Timeline

Compare Your Offer to Your Original Objectives

You set goals before this opportunity arrived. You defined what success looks like, what timeline works for your life, and what trade-offs you will accept. Now you need to measure this specific offer against those original criteria, not against some imaginary perfect scenario. This step separates offers that genuinely improve your situation from ones that just feel new or exciting.

Pull out your original objectives. If you were job hunting, you likely identified must-haves like salary range, location flexibility, or specific skill development. If you were shopping for a home or car, you set parameters around budget, features, and timing.

Hub-and-spoke showing core objectives to compare against an offer - offer decision checklist

Compare your offer directly to those original criteria. Does it meet your minimum salary threshold, or does it fall short? Does the timeline match your needs, or does it force you to rush? Does it require you to relocate when you specifically wanted to stay put?

Assess Manager Quality and Leadership Fit

Gallup research shows that the person you report to strongly influences job satisfaction. If you set a goal around working with strong leadership and your offer includes manager details, verify that fit carefully. If your offer fails to meet even one of your original non-negotiable criteria, that signals a genuine warning, not something you can rationalize away later.

Calculate Your Actual Monthly Impact

Overlay your budget and schedule reality onto the offer. A higher salary means nothing if it requires a 90-minute commute that costs you $400 monthly in gas and vehicle wear, or if it demands 60-hour work weeks when you committed to protecting family time. Calculate the actual impact on your monthly cash flow and daily schedule.

If you buy property, factor property taxes for your specific location and homeowners insurance costs-these vary dramatically by region and shift your true monthly cost by hundreds of dollars. If you change jobs, account for any income gap during transition, whether your health insurance coverage starts immediately or after a waiting period, and whether you lose or gain retirement matching contributions.

Document Real Numbers on Paper

Write down these real numbers so you see the actual financial and time impact, not the headline offer amount. This prevents the common mistake of accepting something that sounds good in theory but creates genuine strain in practice. Once you understand what the offer truly costs you in time and money, you need to examine whether hidden problems lurk beneath the surface.

Red Flags and Warning Signs

Vague Language Hides Real Problems

Vague language in your offer document signals trouble ahead. If the compensation structure uses phrases like “competitive salary,” “market rate,” or “based on experience” without stating an actual number, walk away from the negotiation table. You cannot manage what you cannot measure. The same applies to benefits descriptions that promise flexibility without defining what flexibility means, or roles that describe responsibilities as “other duties as assigned.” These phrases create legal cover for the employer or seller while leaving you with no clarity about what you’re actually committing to.

Demand specificity: exact salary figures, defined benefits, explicit job responsibilities, and clear timelines. If someone resists providing these details, that resistance itself tells you whether to proceed. Vague offers protect the other party, not you.

Artificial Urgency Pressures Bad Decisions

Pressure to decide quickly deserves your skepticism. A legitimate offer gives you reasonable time to review terms, consult advisors, and think through implications. If a hiring manager says you must decide within 24 hours, or a real estate agent claims three other buyers are waiting, question the urgency. Real opportunities rarely evaporate overnight, and anyone pushing artificial deadlines prioritizes their timeline over your careful judgment.

You have the right to take several days, consult a lawyer or financial advisor about terms, and discuss the decision with people who know your situation. If the offer withdraws because you asked for reasonable time, you avoided a relationship that would have pressured you constantly.

Three major offer red flags explained - offer decision checklist

Unresolved Contingencies Create Hidden Risk

Unresolved contingencies represent a serious category of problems. If you are buying property, never finalize your decision before the inspection happens and you review results. If you are taking a job, do not commit until background checks clear and you confirm start dates, benefits enrollment procedures, and any conditions that could change your actual start.

If your offer depends on contingencies like the seller’s approval, financing approval, or reference checks, those contingencies must resolve before you fully commit. Document in writing what happens if contingencies fail: Does the offer remain valid? Can you back out without penalty? What timeline applies? Offers that leave these questions unanswered create situations where you discover problems too late to protect yourself.

Final Thoughts

You’ve reviewed the terms, measured the offer against your goals, and identified any red flags. Now you make the actual decision-the moment where many people hesitate because they want certainty that doesn’t exist. No offer is perfect, and every choice involves trade-offs. Compare what this offer actually gives you against what you’re giving up, then make a deliberate choice rather than drifting into acceptance by default. Write down the genuine pros and cons of accepting this offer based on real details you’ve gathered, then write down what happens if you decline. Comparing the actual outcomes of yes versus no clarifies which choice genuinely serves your situation better.

Talk through your decision with people who know your life and your priorities (a trusted friend, family member, or advisor can spot blind spots you might miss when emotionally invested in the outcome). They help you reality-test whether you’re rationalizing away legitimate concerns or overthinking a solid opportunity. Their perspective matters because they’re not caught in the emotional pull of the offer itself. Once you decide, document it by writing down what you’re accepting, what conditions matter to you, and what happens next.

We at LifeEventGuide built our offer decision checklist around this exact process to help you move through major decisions with clear structure. Your decision matters because it shapes what comes next.


Publisher’s Note: LifeEventGuide is an independent educational publisher. Some articles reference tools or services we recommend to help readers explore options related to major life transitions. Learn more about how we make recommendations here.